Edit User Profile

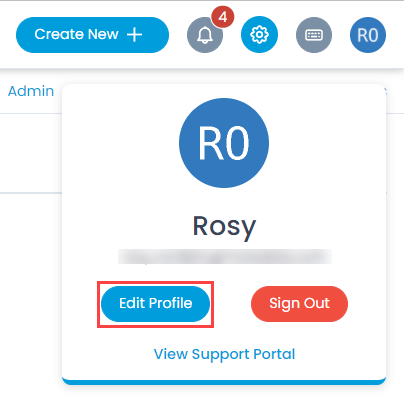
You can manage your profile and update the demographic details using ‘Edit Profile’ option. The option is available at the top-right corner of the application.

Edit Profile Option
Edit Profile Option
Edit Profile Popup
Edit Profile Popup

Profile

This tab allows you to edit the profile details. You can edit the following details:

  • Name
  • Contact No
  • Location
  • Department
  • Time Zone
  • Do not Disturb
  • Language Preference

Once done, click Update.

Preferences

This tab allows you to set the following:

  • Theme: You can set the theme as light or dark.
  • Request Page Layout: You can set the request page layout as split view or list view.
  • Page Size: You can select the number of items to be displayed on a single page. You can select 10, 25, and 50 items per page from the dropdown list. The selected option will be applied as the default page size.
Preferences
Preferences

Change Password

You can change the password from here.

Change Password
Change Password

Enter the Current, New, and Confirm Password, respectively. The password is in encrypted format. To view the password, click the Eye icon. Once the password is entered, click Update and it will get changed.

Delegate Approval

This tab allows you to delegate approval to other users in case you are not available. Once the approval is distributed, the delegated user can approve or reject the requests on your behalf.

Delegate Approval
Delegate Approval
  • Enable Delegate Approvals field to distribute approval to another user. By default, disabled. If enabled, enter the following details:
  • Delegate To: Select the user to whom the approval is to be delegated.
  • Delegation Start Date: Select the start date from which the delegated user can approve or reject the requests. The start date must be greater than the current date.
  • Delegation End Date: Select the end date till which the delegated user can approve or reject the requests.
  • Comments: Enter the comments for delegation.

Once done, click Update and an email notification will be sent to the delegated user. Also, a notification is displayed whenever the delegator sign-ins to ServiceOps as shown below.

Notification displayed to the Delegator

Schedule a Survey

Whenever there is a planning of a product feature scheduled, you can also plan your survey after the release. This will help in many ways such as the individual feedback consideration and immediate change in any parameter based on the survey responses.

  • To schedule a survey, navigate to Admin > User Survey > Schedule Survey.
  • A page opens up with the list of already scheduled surveys till now. On the top-right corner is the option to create a new Schedule Survey.
Create Schedule Survey

A very similar form opens up like create survey. For further information on Create Survey

Here, you just need to select the time of survey to be carried out i.e. Once, Weekly, or Monthly.

Schedule Type: Once, Weekly, or Monthly

As soon as you select the required Schedule Type, the system will prompt for a Start date, Time, Day, and Month.

Set Date, Day, Time, and Month
Note: The selected date should be a future date.

Once you are done with the survey creation, all the surveys will appear on the List Page. You can directly Launch Survey, Design the Form, Update Email Template, Edit, or Delete the scheduled Surveys from the Actions tab.

Options Available on the Schedule Survey List Page

Update Email Template

  • You can edit or change the template of the email sent to the requesters for notification as well as launches.
  • Open the Survey detail page of a survey, click on the vertical three dots, and select the Update Email Template option.
Update Email Template Option
  • The Survey From Notification Template popup will open. You can make the desired changes in the form and Update it.
  • You can also add the placeholders using the Insert Placeholder link.
Update Template
Update Template
Inserting Placeholders

Sending Email Notifications

You can send custom email messages to a single and a group of people (stakeholders). This helps them to understand the progress and blockers in the resolution process. The Notifications tab displays a list of sent emails (1) and allows you to send new emails using the Send Email button (2) as shown below.

Notifications Tab
Notifications Tab

To send an email,

  1. Click the Send Email button. A popup appears.
  2. Send Email To: Add the email addresses of the recipients.
  3. Send Email to Technician Group: Select the technician groups who should receive this email.
  4. Send Email to Requester Group: Select the requester groups who should receive this email.
  5. Subject: Displays the subject of the ticket by default. You can change and add your own subject.
  6. Email Content: Type the email body content.
  7. Attach Files: Attach the files of the email.
  8. Once done, click Send to send the email.
Send Email Popup
Send Email Popup

The emails sent appear in the Notifications tab as shown below.

Emails sent from the system

Audit Trail

Audit Trail stores all the actions that you and other technicians perform. This tab is common at all the places in the system. When you are on the details page of any survey, it will display the respective logs.

Audit Logs
Audit Logs

Collaboration

In the collaboration tab, you can make notes and collaborate for the Survey. The tab is at the bottom of the details view of a Survey.

Collaboration tab in the Details view

Collaboration tab displays all the work and communication done for a Survey. Here you can do the following activities:

Features in Work Tab
  • Search: The search works on the content of the notes and collaboration message in the tab. It matches your query with all the content (that technicians have entered) to find the results. This search is case sensitive.
  • Filter: You can search for the notes and collaboration message based on their type. The available types are: All, Collaborations, and Notes.
  • Sort: You can sort all the items from latest-to-oldest and oldest-to-latest.
  • Collaborate: You can collaborate with other technicians. You can start a message thread which is visible to other concerned people. You cannot Survey or delete a collaboration message.
  • Notes: You can add additional information about the Survey so that others can view the same. You can edit and delete a note.

Adding a New Collaboration

  1. Select the type of collaboration: Collaborate or Notes.
  2. Enter the body of the message. To mention someone in collaboration message, press ‘@’. You will see a list of available names. Choose the person whom you want to tag.
  3. You can also attach files for reference using the Attach Files icon.
  4. Once done, click Save.
Adding a Collaboration or Note in Survey

Updating a Survey

When you are working on a ticket, you can update its basic details, parameters, other info, and various activities or actions associated with it.

To update the details, click on the ID of the desired survey and the details page appears. Click the Edit Icon next to its name and a popup appears.

Edit Survey Details
Edit Survey Details

Edit the required details except the Start Date and Validity Days. Once done, click Update.

Cancel a Survey

The system gives you an option to cancel a Survey.

To do so, open the details page, click on the vertical three dots and select Cancel Survey.

A confirmation message appears. Click Yes to continue or No to stop the process.

Cancel Survey Option
Confirm cancelling the Survey

Copy a Survey

This option helps to create a new survey form using the older fields and existing information. The user need not to fill the entire form again as it is already pre-filled.

To copy a survey from the Details page, click the vertical three dots at the top-right corner of the page, and select the Copy Survey option.

Copy Survey
Copy Survey

A new form opens up with the name Copy of Existing Survey name. For Example: Copy of ID: SUR-7

You can change the desired fields and click Create.

Create Copy of a Survey

Archiving a Survey

To archive a survey from the Details page, click the vertical three dots on the top-right corner of the page, and select the Archive option. A confirmation message appears. Click Yes to continue or No to discard the action.

Archive Survey
Archive Survey

To view the archived surveys, use the pre-defined search category All Archived Surveys.

Select ‘Archive filet’ from dropdown